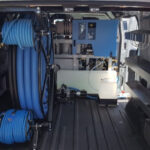
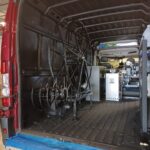
Wiring your new hose reel or hose reel package involves more than simply hooking up “Power” and “Ground” connections. It involves:
- Using the right wire size for the current (“AMP”) requirements
- Connecting to the right locations for power source and ground
- Installing the right fuse for the job- at the right location
- Routing the wire in such a way that it is insulated from damage to wire insulation
NOT wiring it correctly, results in several potential issues.
Here’s “What” to do and “Why” to do it:
First, let’s define a few terms:
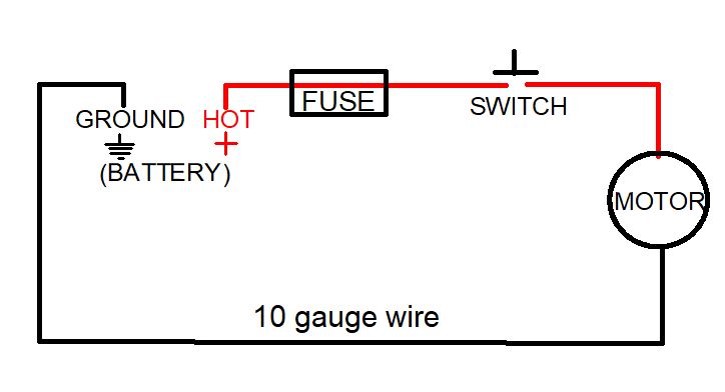
“Electrical Circuit”
The complete path that electricity follows, from the power source “hot” connection, through the switch, through the motor and back to the power source “negative”, or “ground”. As current flows through the circuit successfully, the motor uses part of it, and the remaining current returns to the battery, through the negative terminal.
“Power source”
In this discussion, the term refers to a 12 volt Battery. In carpet cleaning trucks, this is typically the same battery that the truckmount carpet cleaning system uses.
“Hot” (a.k.a., “Live”, “Power”)
A power source, or “hot” source, is the connection that leads directly from the battery “+” terminal, that powers your reel(s).
“Ground”
The negative (“-”) terminal of the battery, or the electrical path back to the battery, from the “hot” source, to complete the electric circuit.
“AMP’s”
The flow rate, or force that electric current moves with.
“Fuse”
A protective circuit breaker that breaks the electrical connection as a safety precaution when necessary.
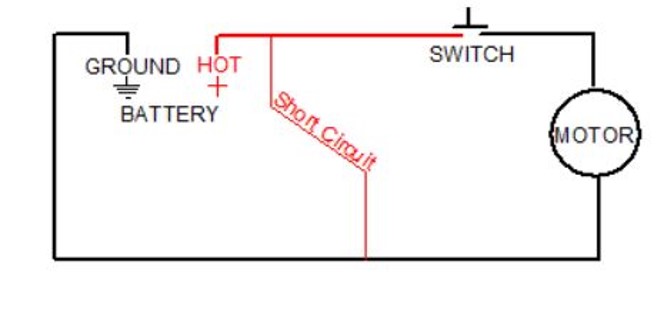
“Short Circuit”
An unintentional electrical circuit that allows current to travel along an unwanted (shorter) path with no or very low resistance, to a “ground”.
The term refers to a circuit that is, “shorter” than the desired one that runs things smoothly, otherwise.
Wire Sizing
The size (both gauge and length) of wire is often overlooked when connecting hose reels to power sources. So, it’s not uncommon that issues of under- performance and inconsistent reel speed result.
Wire sizes used that are too small, at best restrict the flow of current, which results in slow and weak hose reel performance. (It can even have you thinking that something is wrong with the drive motor- when it isn’t.)
At worst, the restriction to current created by undersized wire, can cause the wire to heat up (essentially from “friction”, caused by too much current being forced through too- narrow of a passage way), melt insulation and create a fire hazard.
Typical vacuum reel motors have a maximum draw of 35 AMPs maximum draw of typical hose reel motors
10 gauge copper wire (10 gauge copper is rated for 30 to 40 AMPS, depending upon insulation, temperature (typically, up to 150 degrees, F) and length of wire).
In the vast majority of cases, up to 10 feet in length from your hose reel to the power source, 10 gauge stranded copper wire works well. .
Over 10 feet, 8 gauge stranded copper is a better choice.
Power Source
The best location for power source to your reel is directly to the positive and negative battery terminals of your truck mount battery.
The next best location is to the power connection of your truck mount starter and a mounting bolt of the engine for the “ground”.
The main thing to keep in mind, is that power connections for “hot” and “ground”, should be as direct to the battery, as possible. If they are not and if the connections are corroded (or, become corroded over time), performance will be lost
Fuse
It is important to install a Fuse AT THE POWER SOURCE (i.e., at the positive connection). This will protect all wiring from that location, forward and ultimately, to the hose reel.
Keep in mind that the “+” connection of your battery terminal is always, “on” and does not have an ON /OFF switch. And anything that “shorts” to the wire leading from it, will create potential for a fire.
Without a way to disconnect- automatically and quickly- the wire will heat up, the insulation will melt and the heat of the wire will continue until the wire between the power source and the short to ground becomes red- hot.
With the above in mind, install a fuse of suitable amperage onto the power source “hot” terminal, then connect the power wire to the reel motor, to the fuse.
As stated above, 10 gauge wire is rated at 30 to 40 AMPS, depending upon length and insulation. So, it’s best to use a fuse that’s not rated at more than 40 AMPS.
(Since a vacuum reel motor can use (“draw”, “consume”) as much as 35 AMPs, 40 AMPs for a fuse provides safety in the event of a “dead short” (More on that follows below.), without disconnecting in normal operation.
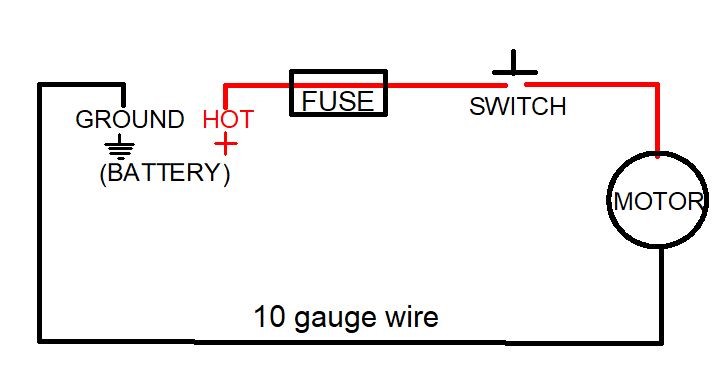
Routing Wire to Prevent Damage (“Short Circuits”)
How this relates to our discussion here, is that a short- circuit bypasses the intended route to and through the reel’s drive motor, sending the current directly to a “ground”, which can potentially create a fire hazard and definitely will “blow” the fuse- IF THE FUSE IS POSITIONED BEFORE THE SHORT.
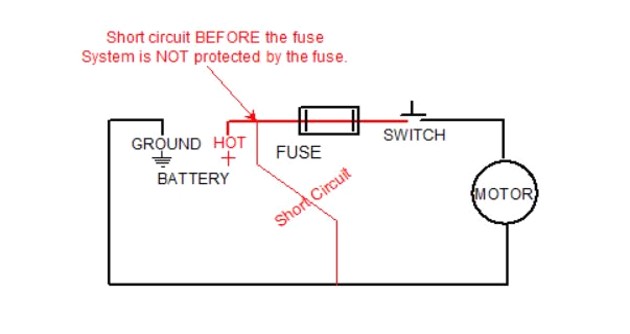
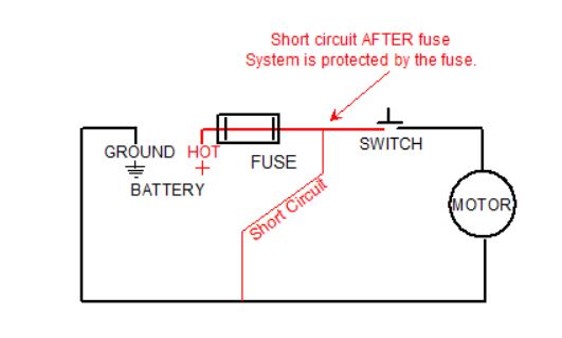
As we said earlier, the drive motor “consumes” part of the current when everything is running correctly. But in the case of a “short”, ALL of the available current is routed through, directly to “ground”, which, due to the increased amperage being routed through the wire (Even small, “tractor” batteries have over 100 available AMPS, which is considerably more than the wire can handle.)
A fuse is designed to disconnect current instantaneously, much quicker than the amount of time that a wire can be damaged by the same current. As a result, dead shorts, though they can be frustrating when and if they occur, will not result in damaged wiring and a fire hazard.
Short circuits are typically the result of damaged or loose wiring that has exposed the metal inside of the wire, which then comes into contact with metal that is not intended to be part of the original electric circuit.
With this knowledge, we also know that the best way to prevent short circuits, is to protect the wire that makes up the desired circuit.
This is done in 3 ways that are used together, for best results:
Protecting the wire insulation, via adding an outer cover for it.
Positioning the wire in a way that isolates it from outside damage.
Ensuring that the wire remains in the position during daily operation
Protecting the Wire Insulation
Adding a cover over wire used gives the wire more protection. And “wire loom” (a.k.a., “split loom”, “convoluted sleeving”, etc.) is the cover of choice, because it is easy to install and provides a buffer around the wire that absorbs impacts and resists abrasion from outside sources.
Positioning the Wire to Isolate It
This involves setting it in place along a path, that places it out of the way of things (such as van cargo) that could fall on it, or rub against it.
Ensuring That the Wire Remains in Position
This important step consists of securing it in place by routing it through something (such as the van wall, or even, along the van wall) for shielding, then using plastic wire ties to lock it in (i.e., fastening the wire to fixed objects like hose reel frame, van wall uprights, etc.) and keep it there.